

In order to have a distinct online presence that is suited to one’s own demands and goals, a custom WordPress website must be built. In contrast to using one of WordPress’s premade themes or templates, a custom-built site gives you complete creative freedom over every aspect of the site’s look, feel, and functions.
Businesses may stand out from the crowd, raise brand awareness, and improve the user experience by developing a WordPress site from the ground up. In a nutshell, a custom WordPress website offers a tailored answer that may aid in the attainment of targeted business objectives and the improvement of the company’s overall online visibility.
What is custom WordPress development?
WordPress is the best content management system and is scaled at a large level. However, refers to the process of creating a unique and customized website using the WordPress platform. It involves modifying or building new WordPress themes, plugins, and functionalities that are specifically designed to meet the specific needs and requirements of a particular client or project.
This approach allows for greater control over the website’s design, functionality, and features, providing a personalized solution that sets the website apart from others built using pre-made templates and themes. Custom WordPress development can also help businesses achieve their specific goals and improve the user experience for their visitors.
Steps to follow and Build Custom WordPress Website
Custom WordPress Website development is a daunting task for a lot, but if you know the way, you can just rock. Therefore, to help you out here is a guide for custom WordPress development. Surely, if you follow the following steps you are set to roll.
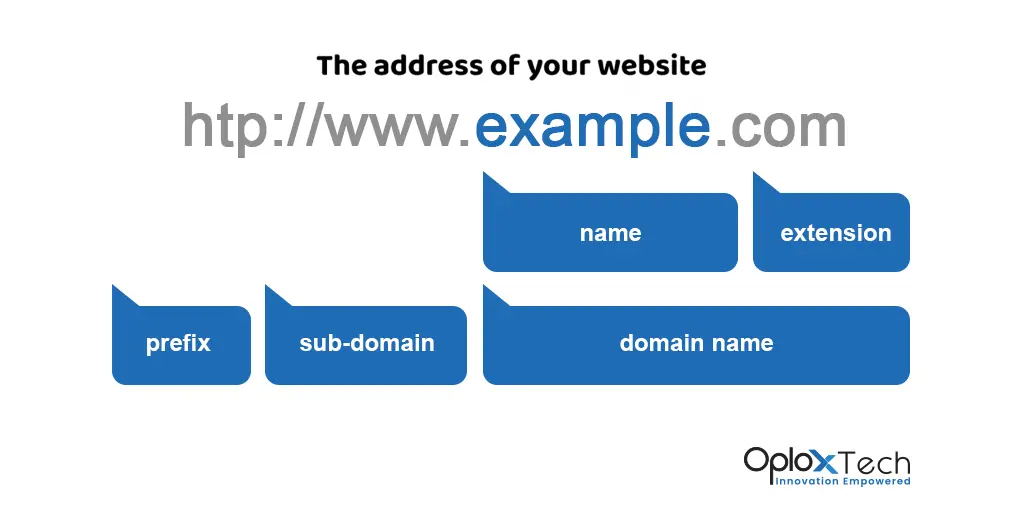
Step 1: Selecting Your Web Identity: A Domain Name
The first step to anything is that you need to do the RND (Research and Development), which is the phase of research and development. Work well on this part before moving forward.
Your domain name serves as your online identity, acting as the go-to address for your target audience to find and recognize your brand. Hence, it’s crucial to choose a name that accurately represents your brand and is effortless for people to remember and type into their browser.
The good news is, you have full control over your domain name selection, as long as the desired name is available and not already claimed by another business.
Consider these tips when selecting a domain name for your website
Make it distinctive and memorable Keep it concise Ensure it’s easy to spell, pronounce, and type Incorporate industry-specific keywords, e.g., if you’re planning to sell pizza, having “pizza” in your domain name could be helpful. For example, compare “www.pizzahut.com” to “pizzasellingplace.com.” The former is more appealing and memorable.
If you need some inspiration, try using a free domain name generator like Domain Wheel. Simply input a keyword relevant to your niche, and the tool will provide you with numerous suggestions.
Step 2: Combine Web Hosting and Domain Registration for Convenience

There are numerous web hosting providers and domain registrars available, but finding a company that offers both services can simplify the process.
One such provider is Hostinger. It is a dependable, user-friendly, and affordable option that includes a free domain name registration. This information is based on the experience of creating several websites for clients.
To take advantage of this offer, visit the Hostinger website using the provided link, click “Start Now,” and select the “WordPress Starter” plan under “Select.” This is the most budget-friendly hosting package that comes with a free domain name.
Step 3: Select a Theme for Your WordPress Website
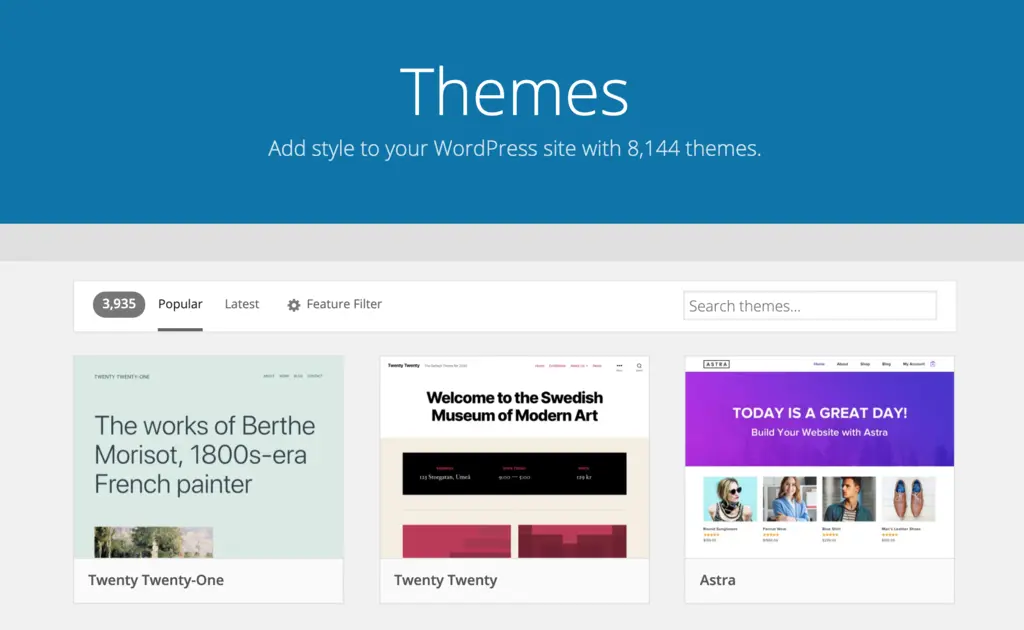
One of the key benefits of using WordPress is its support for themes, which are customizable designs that can quickly change the look of your website.
With over 30,000 themes to choose from, selecting the right one can be a challenge. A good starting point is the official theme directory on WordPress.org, but for a wider range of options, consider theme stores and marketplaces such as Theme Forest. These third-party sites offer both free and paid themes that can enhance the appearance and functionality of your WordPress site while preserving your content.
Installing a Theme from the Official WordPress Directory:
- Go to Appearance, then Themes, and click on Add New.
- Search for the desired theme and click Install.
- After installation, click Activate to enable the theme on your website.
Installing a Premium Theme:
- Download the .zip file of the theme.
- Log in to the WordPress dashboard, go to Appearance, and then Themes.
- Click Add New and select Upload Theme.
- Choose the .zip file from your computer and upload it.
- After a successful upload, click Activate to enable the theme on your website.
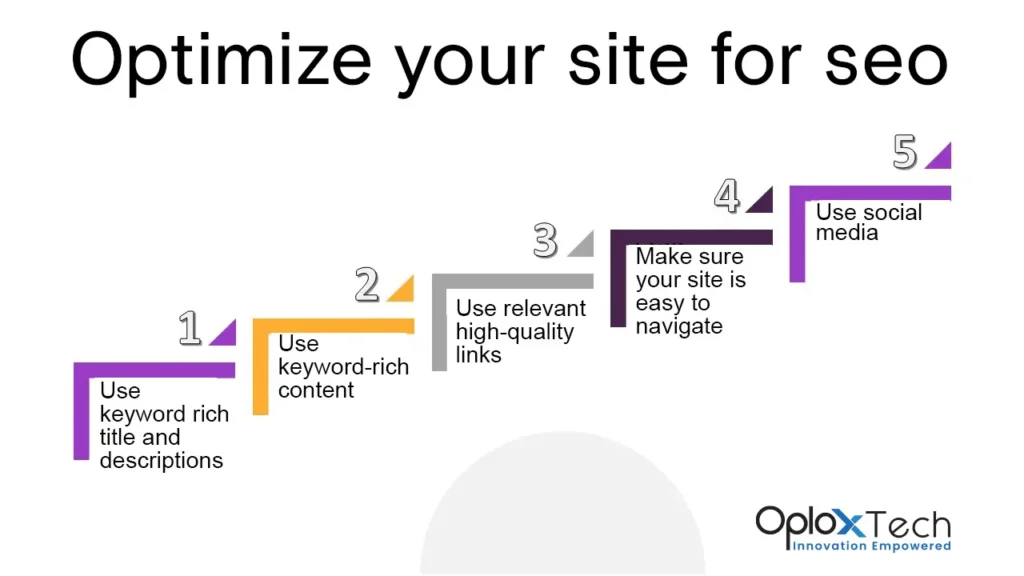
Step 4: Making Website Rich with SEO Optimized Content
WordPress features two main content types: posts and pages. Posts are part of the blogging feature and are displayed in a reverse-chronological order, meaning the newest entries are displayed first. Pages, on the other hand, are meant to be static, one-off content pieces, such as an About page, Contact page, Privacy Policy, custom landing page, etc.
By default, WordPress displays your blog posts on the front page of your website. However, you can change that and set any static page as your homepage. The process of doing that will be covered later in this guide.
You have the option to create a separate page for your blog or news section to showcase your recent posts, or you can even create a website without a blog section at all.
Now, let’s add some content to your website. Start by creating a few pages for your WordPress site. Don’t worry if you don’t have enough content for these pages at the moment as you can always edit and update them later.
Step 5: Custom Structuring and Configuration
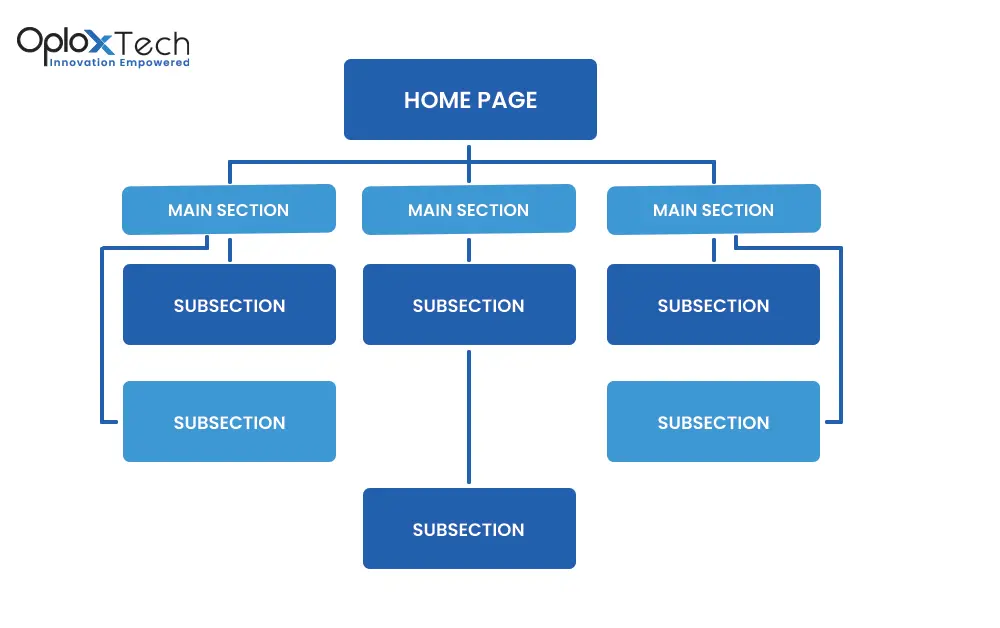
Apart from permalinks, there are other important site settings you should configure to ensure your website runs smoothly. Some of these include:
- Time zone: Go to Settings > General, and then choose the correct time zone for your location.
- Site Title & Tagline: Go to Settings > General, and then enter the title and tagline that best describe your website. This text appears in the search engine results and the browser tabs.
- Site URL: Go to Settings > General, and then ensure that the correct URL is entered in the WordPress Address (URL) and Site Address (URL) fields.
- Discussion Settings: Go to Settings > Discussion, and then configure your preferred comment settings, such as comment moderation and email notifications.
- Privacy Settings: Go to Settings > Privacy, and then choose the privacy option that best suits your website.
These are some of the essential site settings you need to configure for your WordPress website.
Step 6: Website Promotion
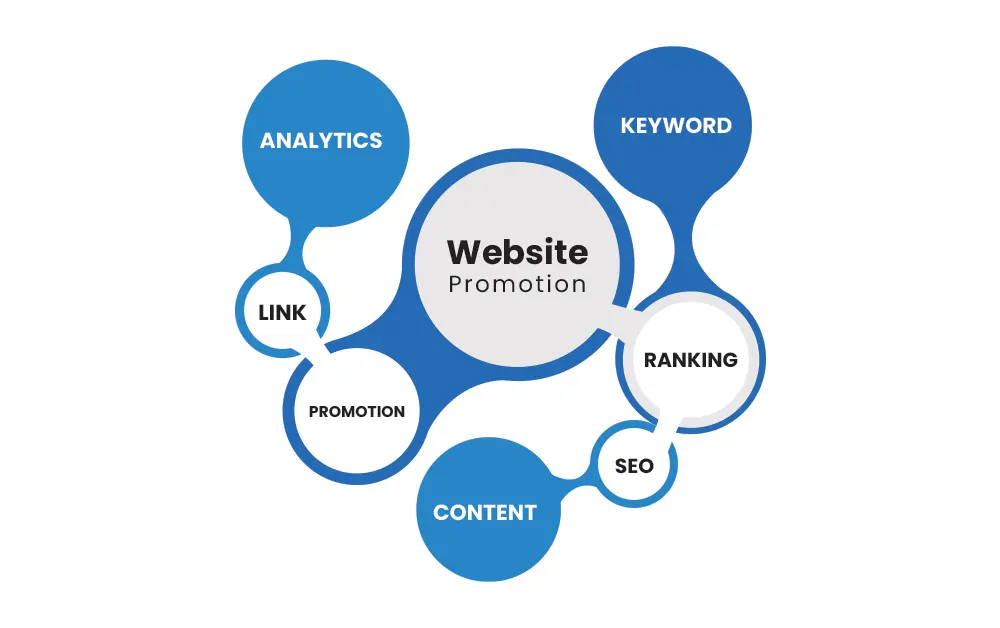
Additionally, promoting your website is key to attracting visitors and increasing traffic. There are many ways to promote your website, including search engine optimization (SEO), social media marketing, content marketing, and paid advertising.
Make sure to use keywords in your content and meta descriptions, share your content on social media, and interact with your audience. You can also consider guest blogging on relevant websites, and participating in online forums related to your niche.
| Step 1 | Selecting Your Web Identity: A Domain Name |
| Step 2 | Combine Web Hosting and Domain Registration for Convenience |
| Step 3 | Select a Theme for Your WordPress Website |
| Step 4 | Making Website Rich with Optimized Content |
| Step 5 | Custom Structuring and Configuration |
| Step 6 | Website Promotion |
Remember, the key to a successful website is having quality content and promoting it effectively. Good luck with your website!
Conclusion
Building a website on WordPress has become significantly easier in recent years due to the continued advancements and improvements made by the WordPress community.
Despite these advancements, there may still be certain complexities in the process that might require guidance.
However, there’s no need to worry. If you need help setting up your website, OploxTech is here to offer you 24/7 support and assistance with all your website needs. With their support, you’ll be able to handle even the most complex aspects of website building with ease. They have a team of experts who are always ready to assist you and ensure that your website is set up and running smoothly.
In conclusion, setting up a website on WordPress may still have some challenges, but with the help of OploxTech, you can rest assured that you will be able to overcome them and create a website that meets your needs and expectations.


